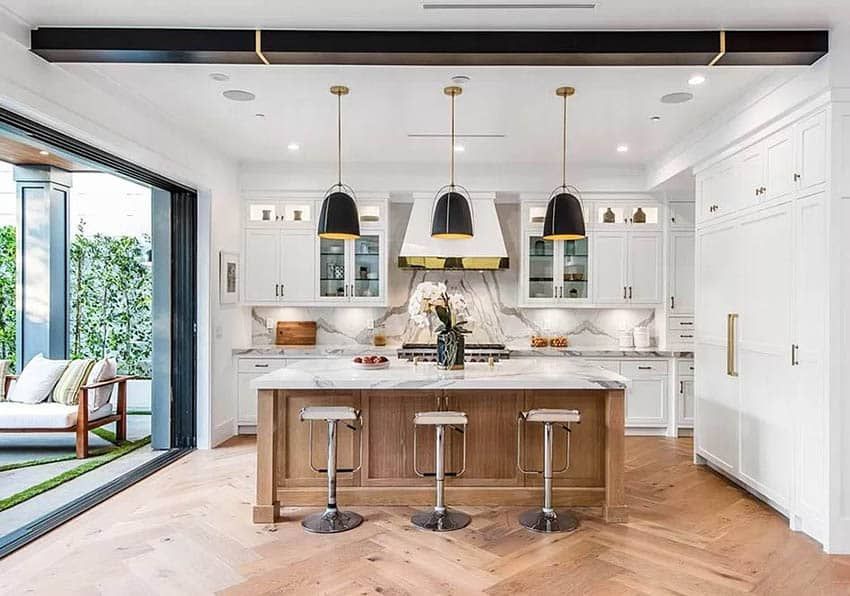
Building a kitchen island is a versatile and practical addition to any kitchen space, providing extra countertop space, storage, and a central hub for cooking and entertaining. Building a kitchen island can be a rewarding DIY project that enhances the functionality and aesthetics of your kitchen. In this comprehensive guide, we will walk you through the step-by-step process of building a kitchen island from scratch, including planning, materials needed, construction, and finishing touches.

Planning Your Kitchen Island
Before you start building your kitchen island, it’s essential to plan carefully to ensure that it meets your specific needs and fits seamlessly into your kitchen layout. Consider the following factors:
- Size and Shape: Determine the size and shape of your kitchen island based on the available space in your kitchen. Consider factors such as traffic flow, clearance around the island, and the intended use of the island.
- Functionality: Decide on the features you want your kitchen island to have, such as storage cabinets, drawers, seating areas, or built-in appliances like a sink or cooktop.
- Style and Design: Choose a design style that complements your existing kitchen decor. Whether you prefer a modern, farmhouse, or traditional look, select materials and finishes that align with your aesthetic preferences.
- Budget: Establish a budget for your kitchen island project, considering the cost of materials, tools, and any additional features you plan to incorporate.
Gathering Materials and Tools
Once you have a clear plan for your kitchen island, gather the necessary materials and tools to begin the construction process. Here is a list of common materials and tools you may need:
Materials:
- Plywood or solid wood for the base
- Countertop material (such as granite, quartz, or butcher block)
- Cabinet hardware (handles, knobs)
- Wood screws, nails, and glue
- Paint or stain for finishing
- Trim and molding (optional)
Tools:
- Measuring tape and pencil
- Circular saw or jigsaw
- Drill and driver
- Hammer and nails
- Screwdriver
- Level
- Sandpaper
- Paintbrushes or rollers
Constructing the Kitchen Island Base
- Cutting the Wood: Begin by cutting the plywood or solid wood to the dimensions of your kitchen island heigh, including the sides, top, and bottom panels.
- Assembling the Frame: Assemble the frame of the island using wood screws and glue. Ensure that the corners are square and the structure is sturdy.
- Adding Cabinets or Shelves: If you plan to include cabinets or shelves in your island, install them within the frame according to your design. Use the appropriate hardware to secure them in place.
- Attaching the Countertop: Once the base is constructed, attach the chosen countertop material securely using screws or adhesive. Make sure the countertop overhangs the base evenly on all sides.
Finishing Touches and Customization
- Painting or Staining: Apply a coat of paint or stain to the kitchen island base and any additional trim or molding for a finished look. Choose a color that complements your kitchen decor.
- Installing Hardware: Attach cabinet handles, knobs, or other hardware to the doors and drawers of the island for added functionality and style.
- Adding Extras: Consider adding features such as a towel rack, wine rack, or hooks for utensils to enhance the usability of your kitchen island with stove.
- Sealing the Countertop: If you chose a natural stone or wood countertop, seal it with an appropriate sealant to protect it from moisture and stains.
Installing the Kitchen Island
Once your kitchen island is fully constructed and finished, it’s time to install it in your kitchen. Enlist the help of a friend or family member to assist with lifting and positioning the island in place. Ensure that it is level and securely anchored to the floor if necessary.
In conclusion
Building a kitchen island is a rewarding DIY project that can enhance the functionality and visual appeal of your kitchen. By following the step-by-step guide outlined above, you can create a custom kitchen island that meets your specific needs, style preferences, and budget. With careful planning, quality materials, and attention to detail, you can build a kitchen island that not only adds value to your home but also serves as a central gathering spot for family and friends.
